Ear cleaning makes most dog owners nervous. You don’t want to hurt your dog, and those floppy ears can hide a lot of gunk. The good news is that cleaning your dog’s ears at home is simple once you know the steps.
To clean your dog’s ears at home, you need a vet-approved ear cleaning solution and cotton balls or gauze. Fill the ear canal with solution, massage the base of the ear for 20 to 30 seconds, then let your dog shake its head. Wipe away the loosened debris with a cotton ball. Repeat until the cotton comes away clean.
That’s the short version. Below, we’ll walk through each step in more detail, cover what to avoid, and answer the questions pet owners ask most.
Anatomy & Preparation: Setting Up for Success

A dog’s ear canal is shaped like the letter L. It runs down, then bends sharply before reaching the eardrum. This bend is actually good news for you. It means gentle cleaning at home carries a low risk of hurting the eardrum, since your finger or a cotton ball simply can’t reach that far. The one thing to avoid is forcing the cleaner bottle deep into the ear and squeezing hard, since that can build up pressure in the canal.
When Ears Fight Back
Some dogs tense up, hide, or even snap the moment they see the ear cleaner bottle. This usually happens because their ears hurt during a past infection, so they’ve learned to link ear handling with pain.
The fix is patience, not force. Start by simply touching your dog’s ears while they’re calm and happy, with no cleaner involved. Pair this with a treat every time. Over several days, work up to holding the bottle near the ear, then gently pouring in a small amount, always followed by praise. VCA Animal Hospitals recommends this slow, positive approach for dogs who dread ear handling.
Don’t Overdo It
It’s tempting to clean often once you get the hang of it, but more isn’t always better. Cleaning healthy ears too frequently can actually irritate the skin inside the canal. If your dog’s ears look clean, smell normal, and aren’t bothering them, there’s no need to clean on a strict schedule. Save the full cleaning routine for when you actually see wax, dirt, or your dog has been swimming.
Step-by-Step: How to Clean Your Dog’s Ears Properly

Once you have your supplies ready, the actual cleaning takes just a few minutes per ear. Follow these steps for a safe, thorough clean.
- Gather your supplies. You’ll need a vet-approved ear cleaning solution, cotton balls or gauze pads, and a few treats on hand.
- Get your dog comfortable. Sit with your dog somewhere relaxed, ideally outside or on a towel, since this step can get a little messy.
- Fill the ear canal. Gently lift the ear flap and pour a generous amount of solution into the canal. Don’t worry about using too little. A good amount helps the solution actually reach the debris.
- Massage the base of the ear. Hold the bottle away and gently rub the base of the ear for 20 to 30 seconds. You should hear a soft squishing sound. That sound means the solution is working its way through the canal and loosening wax and dirt.
- Let your dog shake. Step back and let your dog shake its head. This naturally flings a lot of loosened debris up and out of the canal.
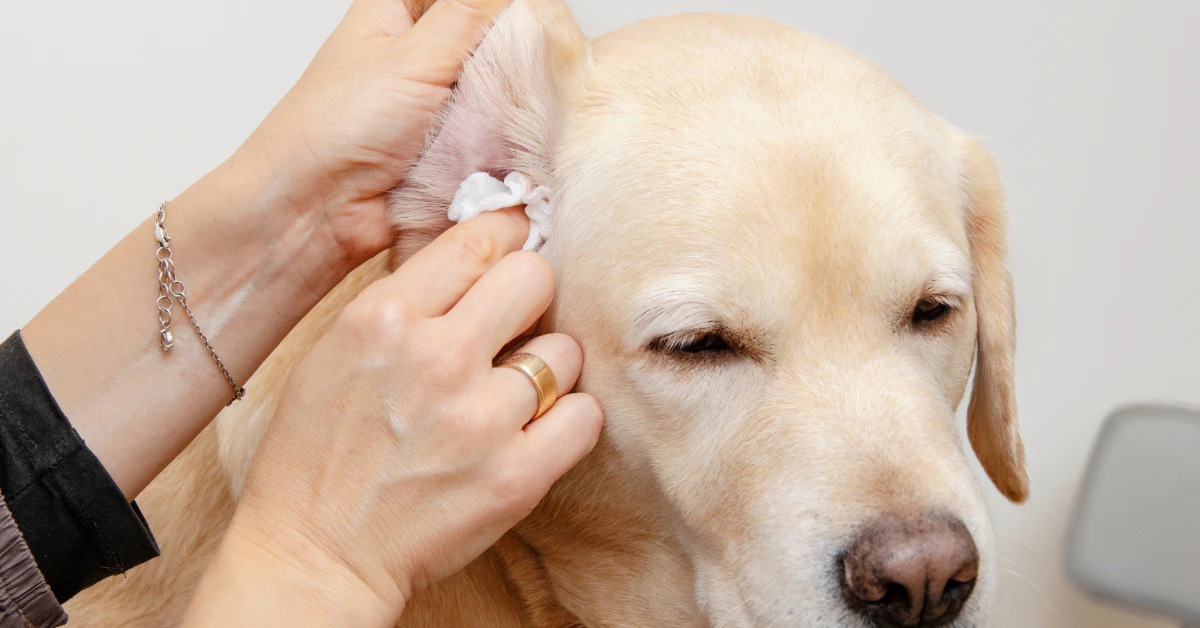
- Wipe away the mess. Use a cotton ball or gauze pad to wipe out the visible part of the ear and the ear flap. Work from the inside out, going only as far as your finger comfortably reaches.
- Repeat if needed. If the cotton still comes away dirty, repeat the process until it comes out clean. Then do the same on the other ear.
- Reward your dog. A treat at the end helps your dog build a positive association with the whole process.
Wipes vs. Liquid Solution
Ear wipes work well for quick, light touch-ups, like wiping away a bit of dirt after a walk. They’re handy, but they only clean the outer, visible part of the ear.
A liquid solution does more. It flushes deeper into the canal, breaking down built-up wax and debris that a wipe simply can’t reach. If your dog’s ears are visibly dirty or smell a little off, a liquid solution and the full massage-and-wipe method is the better choice.
Never Use Cotton Swabs
Never use a cotton swab (Q-tip) inside your dog’s ear. Instead of removing debris, swabs tend to push it deeper into the canal, right toward the eardrum. Stick to cotton balls or gauze, which clean effectively without that risk.
Dangerous Myths and Home Remedies to Avoid
When you’re out of ear cleaner or want a more “natural” option, it’s tempting to reach for things already in your bathroom cabinet. Here’s why some popular swaps actually do more harm than good.
Hydrogen Peroxide
Peroxide seems like a natural choice since it bubbles and looks like it’s cleaning. But inside that L-shaped ear canal, it doesn’t evaporate the way it does on skin. It just sits there, keeping the ear damp. A damp ear canal is exactly the kind of environment yeast and bacteria love to grow in. On top of that, peroxide can sting badly if the ear is already irritated or infected. Skip it entirely.
Apple Cider Vinegar
ACV has a reputation as a gentle, natural cleaner, but most veterinarians don’t recommend it for ears. There’s no verified, safe recipe or dilution ratio backed by vets, and vinegar can easily irritate the sensitive skin inside the canal. If a cleaner is what your dog needs, reach for a real ear cleaning solution instead of mixing something up at home.
Dawn Dish Soap
Dawn might be famous for cleaning wildlife after oil spills, but that doesn’t make it ear-safe. It’s a strong degreaser, not formulated for a dog’s skin pH, and it can strip away the oils that protect sensitive skin. Keep dish soap away from your dog’s eyes and ears entirely.
No Solution on Hand?
If you’re completely out of ear cleaner, don’t improvise with household products. The safest stopgap is a plain, damp cotton pad to gently wipe the outer, visible part of the ear only. This isn’t a substitute for a real cleaning when your dog’s ears actually need one, so pick up a proper vet-approved solution as soon as you can.
Reading the Signs: Wax Colors, Infections, and Plucking

A quick note before we go further: this article is meant to help you with routine ear care at home. It isn’t a substitute for professional veterinary advice. If your dog shows signs of infection, like redness, itching, head shaking, odor, or discomfort when the ear is touched, it’s time to call your vet instead of just cleaning.
What Does the Color Mean?
Not all ear gunk is the same, and the color can actually tell you a lot. Here’s a simple breakdown:
| Discharge Color | What It Usually Means |
| Light brown or pale yellow | Normal, healthy earwax |
| Dark brown and waxy | Often a yeast overgrowth |
| Yellow-green and pus-like | Often a bacterial infection |
| Dry, dark, like coffee grounds | Often ear mites (contagious to other pets) |
If you see anything outside of light brown or pale yellow, it’s worth a vet visit rather than just a thorough cleaning session.
What About a Yeast Infection?
Finding dark, waxy, brown gunk doesn’t mean you can clean your way out of it. A true yeast infection usually needs a vet-prescribed antifungal medication. Cleaning alone helps manage mild buildup and supports treatment, but it won’t cure an active infection on its own. Your vet may also want to check the ear under a microscope first, since bacteria and mites can look similar to yeast at a glance.
Should You Pluck Ear Hair?
This one causes a lot of disagreement, even among professionals. Some older grooming habits called for plucking every dog’s ear hair at every visit. These days, vets and groomers mostly agree that healthy ears with no signs of infection should be left alone. Plucking is really only needed when excess hair is trapping moisture or wax and actually causing buildup or irritation. If you’re not sure whether your dog’s ear hair needs attention, ask your vet or groomer to take a look before pulling anything out.
Routine Care: When and How Often to Clean
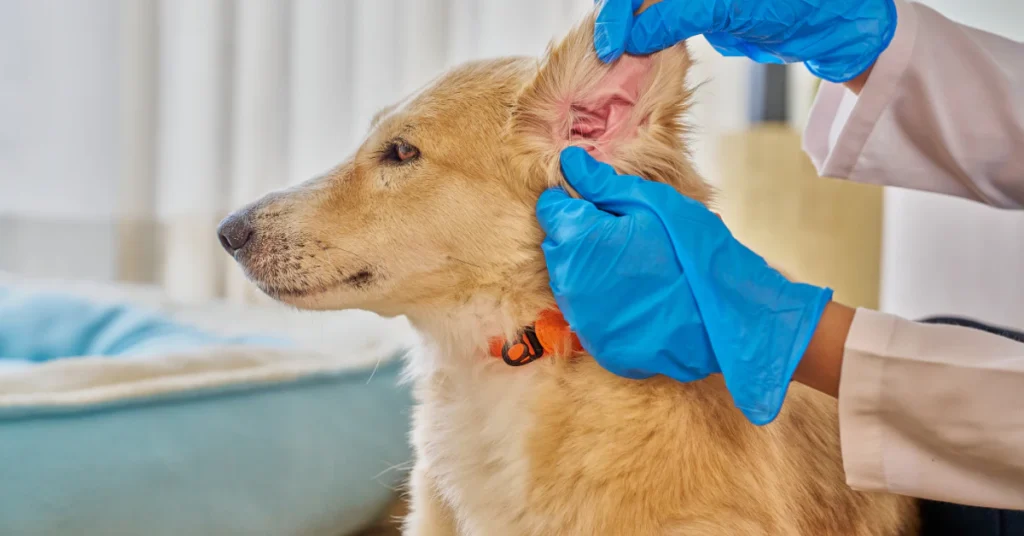
There’s no single answer that fits every dog. For most healthy dogs, cleaning only when you actually see dirt or wax is enough. Cleaning on a strict weekly schedule just because it’s “Sunday” isn’t necessary and can irritate ears that didn’t need attention in the first place.
Some dogs need more regular care, though. Breeds with floppy ears, like Cocker Spaniels, Basset Hounds, Labrador Retrievers, and Poodles, trap moisture and debris more easily. The same goes for dogs with allergies or a history of ear infections. For these dogs, cleaning every 1 to 2 weeks is a reasonable routine to prevent buildup before it turns into a problem.
After Swimming or a Bath
Water that gets trapped in the ear canal creates the perfect damp environment for bacteria and yeast to grow. If your dog swims often or just had a bath, it’s worth cleaning their ears afterward to clear out any trapped moisture. This small habit goes a long way toward keeping ears dry and infection-free, especially for dogs who treat the pool or lake as their second home.
Frequently Asked Questions
What can I use to clean out my dog’s ears at home?
A vet-approved ear cleaning solution, plus cotton balls or gauze. Pour the solution in, massage the base, let your dog shake, then wipe away the debris.
How do you get brown gunk out of a dog’s ear?
Brown, waxy gunk usually means yeast. Clean with a proper solution using the standard method. If it keeps coming back or smells bad, see your vet.
How do you make homemade ear cleaning solution for dogs?
There’s no vet-verified homemade recipe that’s safe and effective. Stick to a real, vet-approved ear cleaner instead of mixing something at home.
Is hydrogen peroxide good to clean dog ears?
No. It doesn’t evaporate well in the ear canal, which keeps things damp and can feed bacteria or yeast. It can also sting an irritated ear.
What kills yeast in dogs’ ears naturally?
No natural remedy reliably treats an active yeast infection. That needs a vet-prescribed antifungal, usually alongside regular cleaning.
How to clean a dog’s ears without solution?
Gently wipe the outer, visible ear with a damp cotton pad only. This is a stopgap, not a real cleaning, so get proper solution soon.
What can I use if I don’t have dog ear cleaner?
Avoid household substitutes like soap or vinegar. A damp cotton pad for the outer ear is the safest temporary option.
What do groomers do to clean dogs’ ears?
Groomers use a dog-specific cleaner and cotton or gauze, and may pluck excess hair if buildup is causing problems.
Can you use Dawn dish soap to clean dogs’ ears?
No. It’s not pH-balanced for a dog’s skin and should be kept away from the ears entirely.
Conclusion
Cleaning your dog’s ears doesn’t have to be stressful once you know the right steps and the right products to avoid. Stick to a vet-approved solution, go gently, and watch for odd colors or smells that need a vet’s attention. With a little patience and the right routine, ear care can become just another easy part of your dog’s grooming, not a dreaded chore for either of you.